Review: Seacam Vacuum Test system
Vacuum housing systems have become de rigueur over the past couple of years, with almost all the major housing manufacturers offering them as either standard fitment, or as an option. In addition, Backscatter, Housing Sentry and others offer “after-market” options that can be fitted to older housings that do not have systems or to those that do not yet have a manufacturer designed option.
The concept is simple and has been employed in the ROV and other industries for many years. In order to verify that a unit is watertight, one pumps some of the air out. If the vacuum that this creates is stable over time, then the unit is sealing.
Seacam released their Vacuum Pressure Test system a few months ago, and Harald Hordosch kindly supplied a unit for testing during the Wetpixel Whale Sharks Expedition.
Many of the current vacuum test systems utilize some kind of continuous monitoring that gives constant feedback as to the vacuum’s status. Seacam have opted for a system that simply tests the housing’s integrity, and then sleeps whilst still acting as am audible and visual moisture alarm.
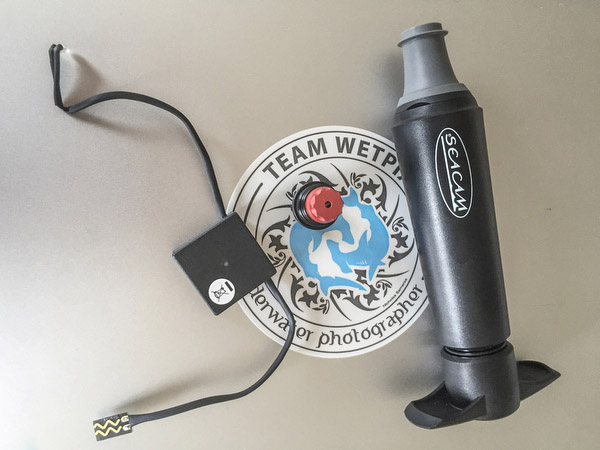
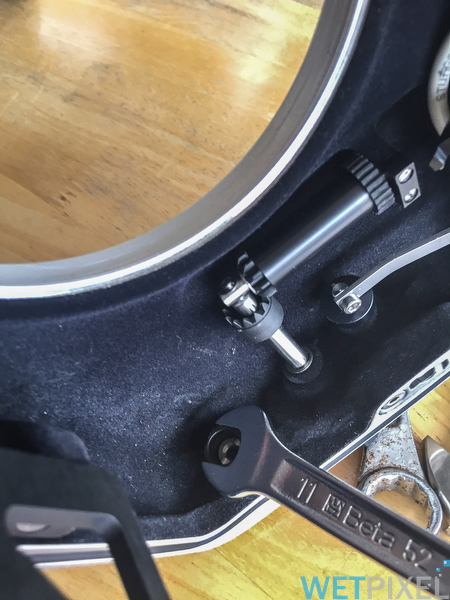
The system consists of a small bulkhead/valve, a control box with a moisture detector and an LED indicator light attached along with a simple pump.
Installation
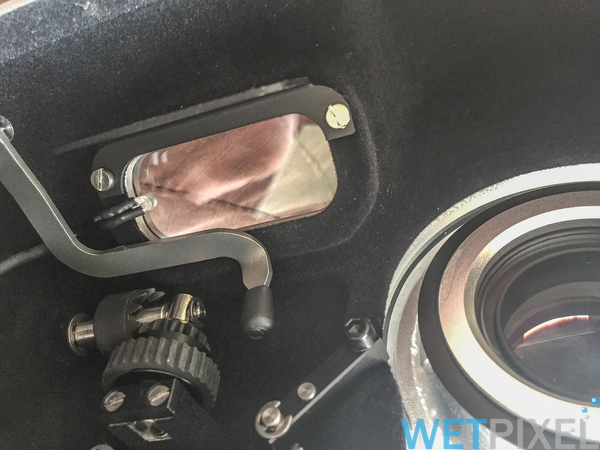
Installing the system is very straightforward. In my case, unclipping the electronic box from the side of the housing allows for the LED to be gently removed from the locator recess in which it sits in the Control Panel’s window.
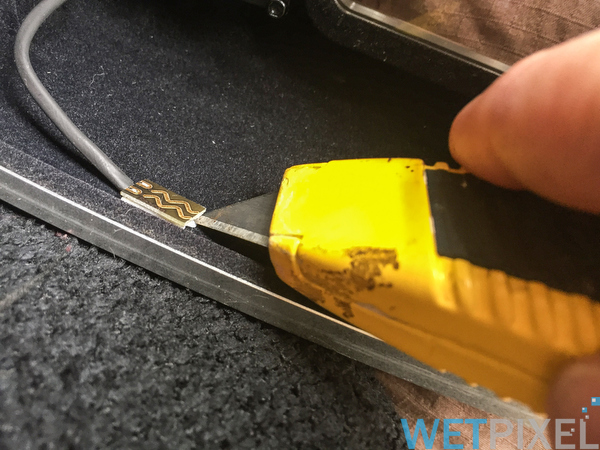
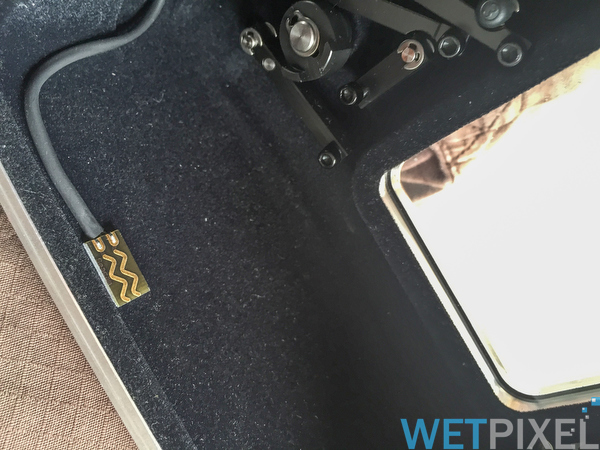
The moisture sensor is fixed using a self adhesive pad into the base of the housing, and by using a sharp knife, can be gently peeled away.
The new wiring and sensor simply slips into place, and the LED locates snugly into the locator hole.
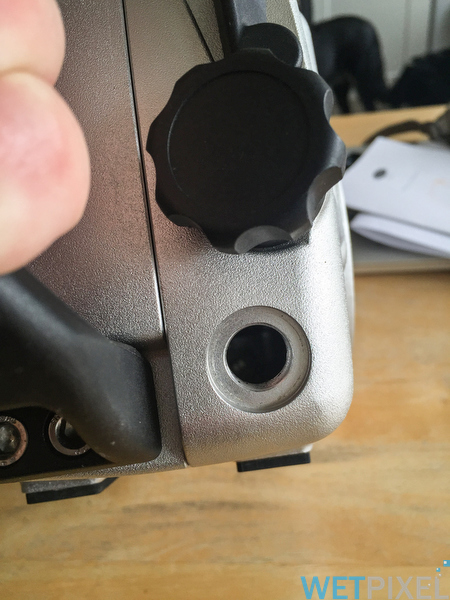
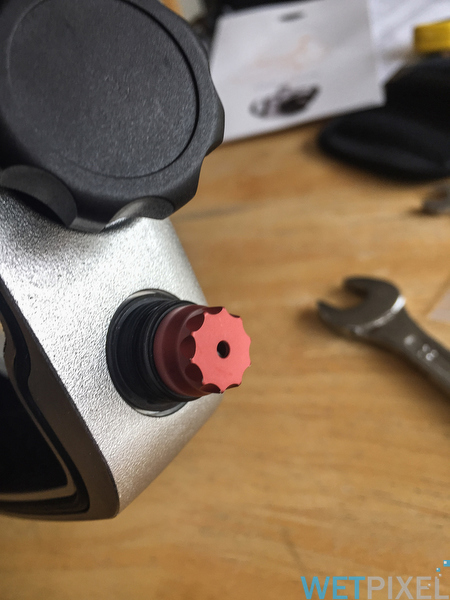
In order to add the valve, the existing bulkhead needs to be removed from the housing. The valve is equipped with an 11mm hex head on its internal surface, and a small spanner is also supplied. This allows the valve bulkhead to be tightened snugly into place. The valve has a screw-on O ring sealed cover.
My housing is a very recent model, and the “LED is white/transparent and the water sensor a square plate with golden lines”.
This meant that the upgrade was very simple to perform. For Seacam owners with older housings which do not have LEDs/water sensors as described, it is worth checking with Seacam or your local dealer for compatibility and installation instructions.
Principles of operation
A well known diving journalist described how he found comfort from a constant green LED that his vacuum system was giving off whilst his housing was sitting assembled in his hotel room overnight! Whilst this does of course mean that the housing is sealing, this constant monitoring also introduces a few potential problems. The primary one is the issue of pressure fluctuations in the housing caused by temperature changes. “False positives” are a problem, particularly given that we all spend large amounts of time and money to get in the water and take images. An alarm that is triggering unnecessarily and keeping us out of the water, is perhaps as bad as no alarm at all?
Some of the constant monitoring vacuum systems have some level of temperature compensation built in, but this often simply means that the sensor is set to be less “sensitive” so that small variations are ignored by the alarm. Of course, this may also mean that the sensor misses small pressure changes caused by slow leaks too……
Seacam’s approach is that the vacuum system is simply a tool to ensure that the user’s pre-dive housing preparations are adequate. The user activates the system by lightly wetting the water sensor and a tone will sound. The housing is then closed. As long as he or she then initiates a vacuum within 2 minutes, the system is activated. To initiate this vacuum, the valve is closed and the pump used to start removing air from the housing.
Once the sensor detects a vacuum, the LED starts to flash green. The user should continue to pump until the LEDs blink red and the unit emits 3 sets of three tones. The LEDs will then blink red/green. To some extent, the amount of pumping required varies according to the internal volume of the housings and port. It then monitors the status of the vacuum for 4 minutes or so. After this, and assuming no change in the vacuum, the LEDs will flash green several times over 10 seconds, together with a long audible tone to signify that the test is complete and succesful. At this point, the vacuum monitor goes into sleep mode, although the moisture detector is still active. It is important to replace the valve cover. By design, it is impossible to attach the cover unless the valve is closed.
If the vacuum is compromised during the test, the LEDs flash red for 10 seconds and a tone will sound.
In addition, the LED gives warning of low battery conditions with an orange LED and tone as a first warning and a tone only to denote very low battery.
In use
Harald sent me the unit for DIY installation, and I was able to install it in around half an hour with no problems. It was supplied with detailed instructions, which certainly eased the process. The only additional tool I needed was a sharp knife to peel away the old water sensor cleanly from the housing lining.

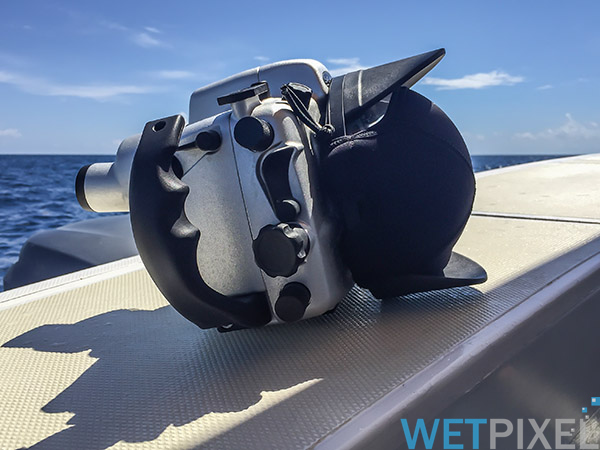
Once installed, I was able to take the new unit with me to Mexico for the Wetpixel Whale Sharks expedition. It was used every day for the 3 weeks of the trip, In addition it has been used a fair bit subsequently.
The valve is very discrete and low profile, effectively occupying no more space than a standard bulkhead. Given the position of the spare bulkhead on my Seacam housing, this means that it does not interfere in any way with the command dials located above it.
The pump is a standard vacuum pump similar to those used by many other manufacturers. It is adequate as it pulls sufficient vacuum relatively quickly, even when the housing has a large dome port attached. The fact that it is a common type means that if one is damaged or lost, it is relatively easy to find a replacement. It does not need any special connection to attach onto the valve.
There is no doubt that any vacuum system certainly gives the user more confidence in their housing’s seals. The Seacam system does so, but avoids the issue of temperature changes causing false alarms, and removes the need for temperature compensation circuitry or tweaks to avoid these. Practically, all a leak detector needs to do is verify that the user has correctly installed the O rings and seals on their housing and that there are no defects caused by (mis)handling that may cause a leak. Once it has checked this, there is no need for continuous monitoring in my experience.
It is important to stress that the Seacam system’s water alarm is still active, despite the vacuum being asleep. Whilst it is unlikely, some kind of leak that was somehow missed by the vacuum test would still sound the alarm.
No vacuum system, including this one, can prevent or help with catastrophic events like a port glass failing in some way. The Seacam system does maintain the vacuum after the test, so the housing cannot open or the ports unscrew until the valve is opened and the negative pressure released.
The unit is powered by one CR23 battery, and Seacam has designed the system to minimize current consumption, in order to prolong battery life. My experience is that it I have been using it for over two months now, with no sign of the battery becoming exhausted. CR23s are fairly easy to get hold of, although it is always wise to pack a spare.
The test process is straightforward and simple. My only quibble with the unit is that in the event of the vacuum not holding, I would like a continuous flashing red LED until the vacuum is released. This would mean that if a user becomes distracted during the test, there would be clear visual confirmation that the test had failed.
Conclusion
Whilst many people have taken pictures underwater without vacuums sensors, it is undeniably true to say that many of us have also flooded housings in situations where a vacuum would have prevented it. Seacam’s Vacuum Pressure Test not only provides the additional security that these devices offer, but also avoids potential false positives and undetected slow leaks. It is very also neat and low profile. If you have a Seacam housing, I would recommend that you purchase one without delay.
Availability
The Seacam Vacuum Pressure Test and Water Alarm is available now. Please contact Seacam or your local dealer for more information. It is priced at €360 in Europe.
FTC Disclosure
The Vacuum Pressure Test was supplied free of charge by Seacam for the review. The reviewer is retaining the unit after the review. Many thanks to Harald Hordosch for his assistance.